UPD tutorial 2024 - Nadja May Kramer - 3033426
Using Vertex Paint on Trimsheets to create unique story-telling assets
Welcome artists, to a tutorial that bridges the gap between the creative and technical sides of environment art. In this blog tutorial, we will explore the creation of unique and compelling story-telling assets with the use of vertex paint on trimsheets. While I'll demonstrate the process using wooden props, the techniques covered can be applied to a wide range of projects. All the images in this tutorial are created by me, unless otherwise stated.Tutorial Highlights
- Planning and Designing
Let's talk about how to plan your art adventure and cook up designs that'll grab attention.- Texture Creation
We're going to look at our existing trimsheet and create an extra version.- Implementation in Unreal Engine 5
Time to blend our creations (trimsheet + assets) into the Unreal Engine 5 mix. Let's create a vertex paint material and make your art game-ready!
Introduction
My name is Nadja May Kramer, a 4th year student at the HKU, bachelor CMGT. At this moment I am busy with my graduation project and to support my final project I made this basic technical tutorial about trimsheets and vertex paint. My graduation project is about weapon shops, making them a bigger part of a game and making the player able to test their weapon in-game before buying.
Join me for a quick (30-60 min) dive into the world of Unreal Engine 5 as we explore the fusion of trimsheets and vertex paint. This method helps me with:Distinctive Touch. Elevate assets with nuanced details for a truly unique aesthetic.Texture Mastery. Conceal the repetitive patterns of trimsheets with the finesse of vertex paint.Narrative Crafting Transform trimsheets and vertex paint into powerful tools for immersive storytelling.
In this tutorial, I'll guide you through creating a variation that allows dynamic addition and removal of paint on a wooden trimsheet within the engine using vertex paint. However, the possibilities are vast, and I encourage you to brainstorm different ideas for your own projects.Knowledge and softwares
Before diving into this tutorial, it's recommended to have some background knowledge in 3D modeling, trimsheets, materials, and Unreal Engine. If you're familiar with these concepts, you're all set for an exciting journey!- Blender 3.5
- Zbrush 2022.0.6
- Adobe Substance Painter 9.1.0
- Unreal Engine 5.0.3While I used these specific versions for the project, this setup is adaptable to various engines and software.At the end of this section, we'll briefly cover the basics of trimsheets and vertex painting. As we progress through the tutorial, we'll delve into designing, brainstorming, project planning, and the exciting process of setting up two textures. We'll then seamlessly integrate trimsheet textures into a vertex paint material, applying it to assets. This method not only adds a narrative touch to your environment but also offers flexibility since we can paint the vertices directly in the engine.
Trimsheets
Trimsheets are textures that can be repeated in the horizontal or vertical direction. They are used to quickly add details to objects that generally consist of simple geometry. Usually, multiple trim elements are included in a trimsheet, which can then be applied to the appropriate faces using UV mapping. This is done to create an illusion of a higher level of detail that is not originally present on the model. It can significantly speed up the workflow and is commonly used for repetitive patterns such as wood, metal, walls, and fabrics. A trimsheet can be used across multiple assets and can be arranged in different layouts. The most valuable thing about trimsheets is their reusability. If your scene contains a lot of wood, it would be possible to texture most of it using one trimsheet. I personally create trimsheets with Blender, Zbrush, and Substance Painter, but there are many other options to explore.Vertex color
What are vertices and what is vertex color? Vertices are points in 3D space where two or more edges meet. They are essential for creating 3D models, defining the geometry and shape of the objects. Vertices are mostly represented by the coordinates x, y, z to determine their exact locations. You can assign colors to individual vertices, and each vertex has its own color information. Vertex color refers to the color or attributes assigned to individual vertices of a 3D model to control its appearance and characteristics.
One of the main topics of this tutorial is vertex painting, allowing you to modify specific colors or data. In Unreal Engine, vertex paint is often utilized for:- Adding detail
- Texture transitions
- Terrain and landscape editing
- Customization and variation
- Artistic effects
Planning
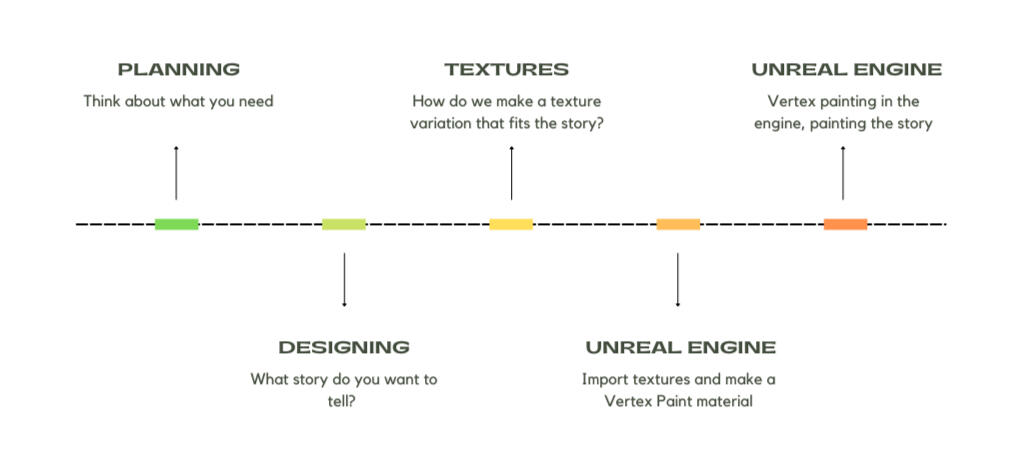
This tutorial should take no longer than 60 minutes, maybe a bit more if you decide to spice things up or you're starting from scratch. Before we start, make sure your laptop or PC is up to date and runs Unreal Engine well. If Unreal Engine runs really slow, you can search in the Unreal Engine forums to find solutions.To help with the navigation through this tutorial, I added a small timeline. If everything is working and you're ready, lets start planning!
Before we dive into the world of trimsheets and vertex painting, let's make sure we've got the basics ready. In this tutorial I won't assist you with creating trimsheets, assets or textures from scratch. Instead, these elements need to be crafted independently following the design phase.A trimsheet
Whether it's a DIY creation or downloaded, ensure you've got a trimsheet ready. A homemade or downloaded trimsheet. If you're new to trimsheets, don't worry. I've got you covered – head to the last page of this tutorial for some trimsheet tutorials created by other artists. Trimsheets are widely used in the industry, so there is lots of information available. For this tutorial, I'll be working with my homemade wood and metal trimsheet.3D assets (in Unreal Engine 5)
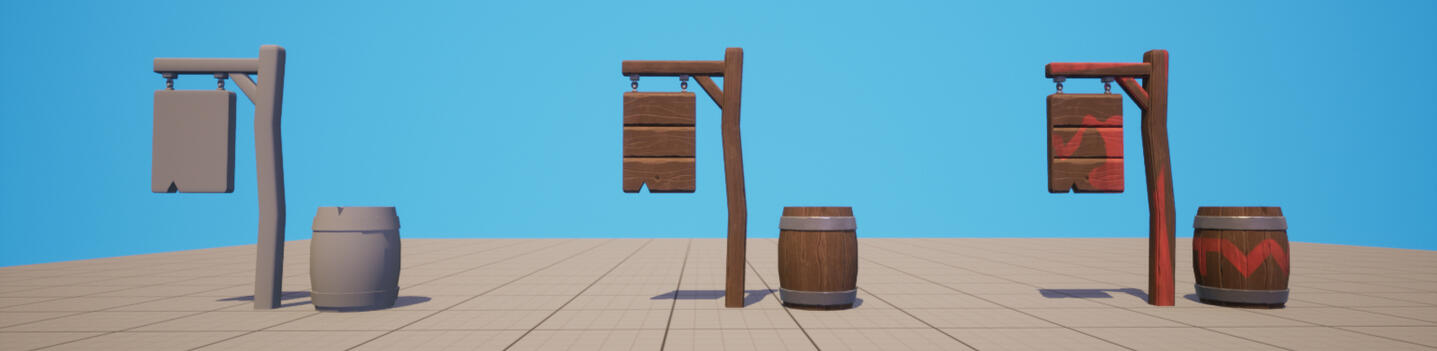
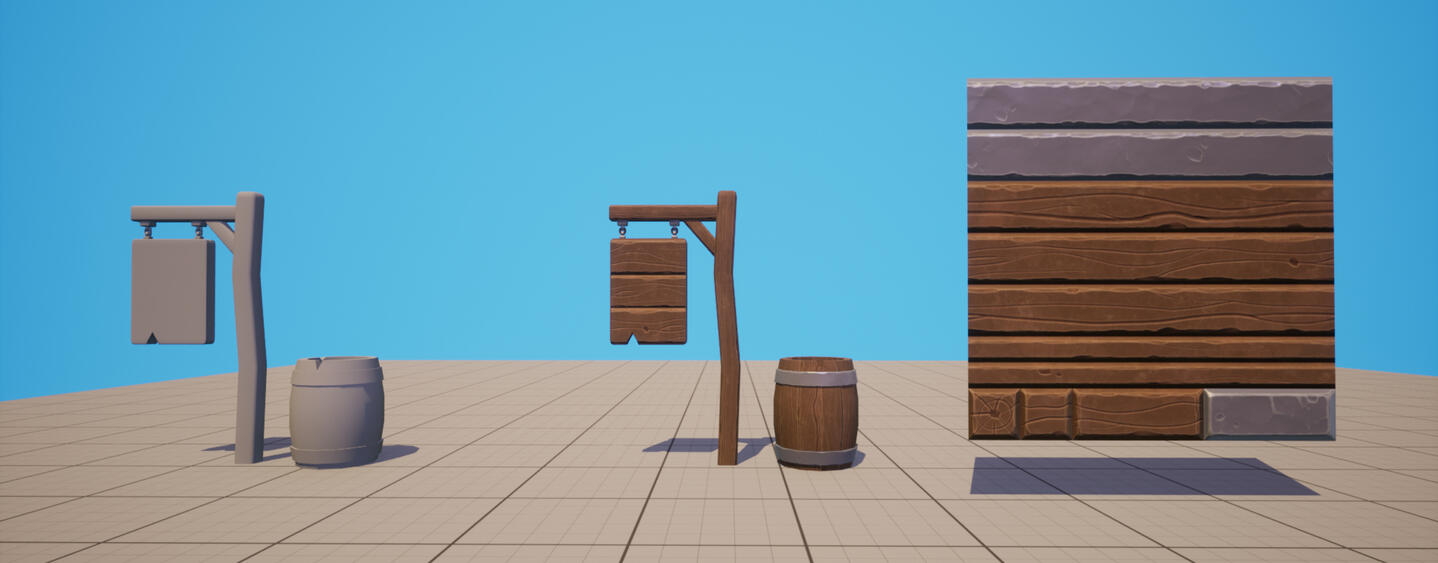
Ensure your asset is correctly integrated into the engine with the trimsheet UV-mapped to the object. It's crucial to note that we'll be applying paint directly to the vertices. If your object is super low-poly, be aware that this method may not match the expected results. I recommend conducting vertex painting tests across different versions of the object—low-poly, mid-poly, and high-poly. This way you can see the differences between each version. It's worth noting that, at times, a low-poly version might already achieve your desired outcome. For this tutorial I will be using 2 assets I created, a barrel and a sign.If you already have a trimsheet with assets, you can still benefit from the upcoming section by contemplating a story for those assets.
design
Now, it's almost time to tweak our trimsheet in Substance Painter. But before we jump in, take a moment to think about the story you want your trimsheet to tell. It's okay to spend some time on this, as this will help us to tell the story we want to tell. In the next steps, I'll guide you through the design process, providing questions to consider and a checklist.
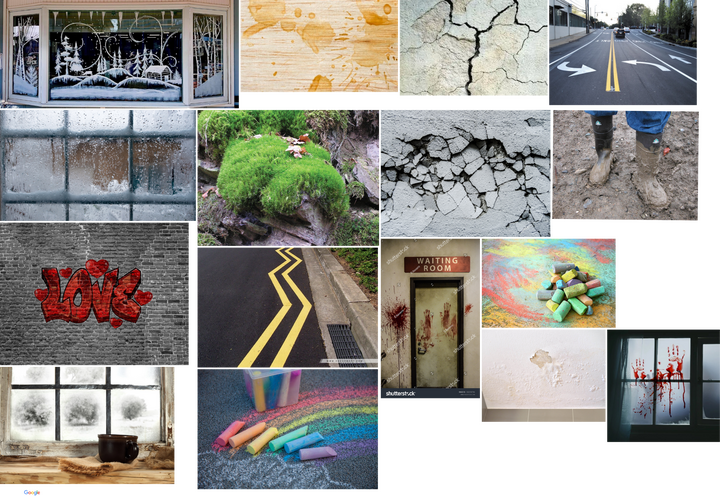
Storytelling within environments holds immense significance. It provides players with context about the character they're playing, other in-game characters, or the environment itself. There are numerous ways to achieve this, but I've found that making subtle adjustments to assets is a effective method.Let's kick off by exploring the possibilities. Consider adding a layer of dirt, a watery texture, signs of water damage, bloodstains, paint splatters, and numerous other options. To get started, create a moodboard where you put down every idea that comes to mind. This brainstorming exercise will help you consider a wide array of possibilities for weaving narratives into your environments.
Now that we have an understanding of the possibilities, let's consider the story we want to convey. If you're yet to create assets, it's beneficial to craft a moodboard as a reference for your designs. However, if you already have assets, a moodboard will not be necessary. The story I'm creating includes my assets, a barrel and a sign.Make sure to have a trimsheet and an asset ready before proceeding this tutorial. If you need help, click here!The story
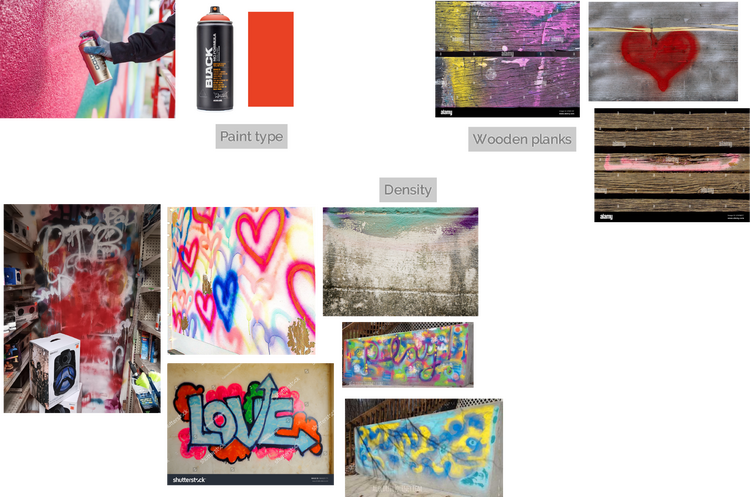
Next, we'll brainstorm ideas for a second layer on the trimsheet, drawing ideas from our moodboards. In my case, I took graffiti as the inspiration behind the story I want to tell. Remember to document your story with as many details as possible."A little rebel from the nearby town found some red spray paint. To annoy the villagers, he colored some signs and barrels red. His unsteady hands betrayed his nervousness about getting caught. He wasn't, what you would call exactly, an artist. The barrels and signs just got covered in red stripes and dots. No one found out it was the little rebel, but some say some of the villagers know but won't tell. He is more liked than he thought."After writing the story, let's distill it into keywords for information we need for the second layer of the trimsheet. My keywords are:- Wooden planks and barrels
- Red spray paint
- Nervous
- Unsteady hands
- Little rebelKnowing these keywords, I can now create a new layer on my trimsheet featuring red spray paint. Given the nervous and inexperienced spray painter in my story, I'll reflect these characteristics in the paint layer by introducing a slightly blurred and uneven density.
Fitting in with the environment
Now, it's time to align our story with the environment's setting. There are a lot of questions to consider, and I recommend putting down your thoughts. These notes will serve as a helpful reference when working on your texture in Substance Painter. Let's begin by outlining the setting of the environment. Consider factors such as the year, weather conditions, gravity, and overall layout. Reflect on how these elements might impact the story you aim to convey.In my case, I can delve deeper with some extra added specific questions. Is the paint wet or dry? How do the two materials look when layered on top of each other My personal responses to these questions are:
- The setting of my environment is a stylized area for a Role-Playing Game set in a recent year with sunny weather. It's within walking distance from a city, surrounded by numerous trees, and features hills that create stunning waterfalls. While it maintains the same gravity as Earth, there are magical elements, such as floating rocks.- The paint is applied using a spray can by someone of a young age (10-14 years old) who lacks experience with graffiti. The paint is already dried, given the summer season, but it appears freshly painted.
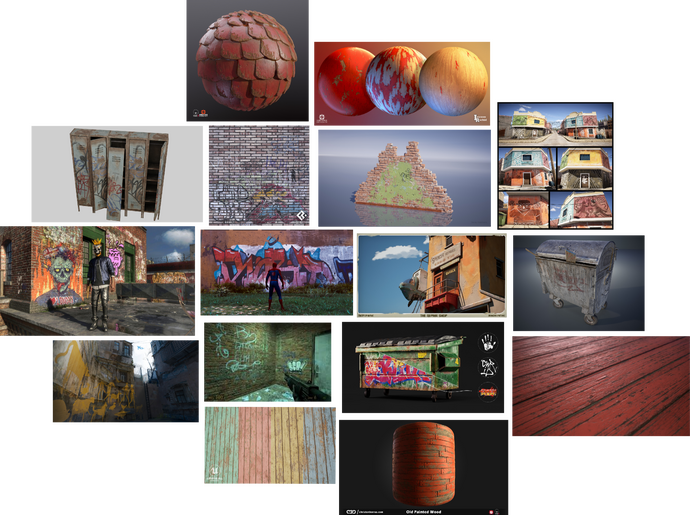
After noting down all these answers and information you collected, it's time to create a specific reference board and a board filled with material inspirations. I gather my images from Google, Pinterest, and Artstation, aiming for around 8 to 20 images. For the boards below, I utilized PureRef, a free software for crafting moodboards. However, feel free to use any software that suits your preferences.
If everything is correct, we should now have a clear idea of what to create and how to convey the story we want to tell. To ensure we have all the necessary elements, I've prepared a brief checklist.Design checklist
- Have you developed a compelling story?
- Do you have your asset with a trimsheet ready?
- Have you determined the type of variation you want to incorporate into your trimsheet?
- Does the design and story align with your environment settings? Are there any necessary adjustments?
- What specific design do you intend to paint on the assets, and does it effectively contribute to telling your story?
Once your boards are prepared, review them again. Check for any missing elements, consider making adjustments, or explore new ideas that may have surfaced. It's perfectly acceptable to create additional boards or even start over. When you are content with the final design, it's time to begin the creation process!